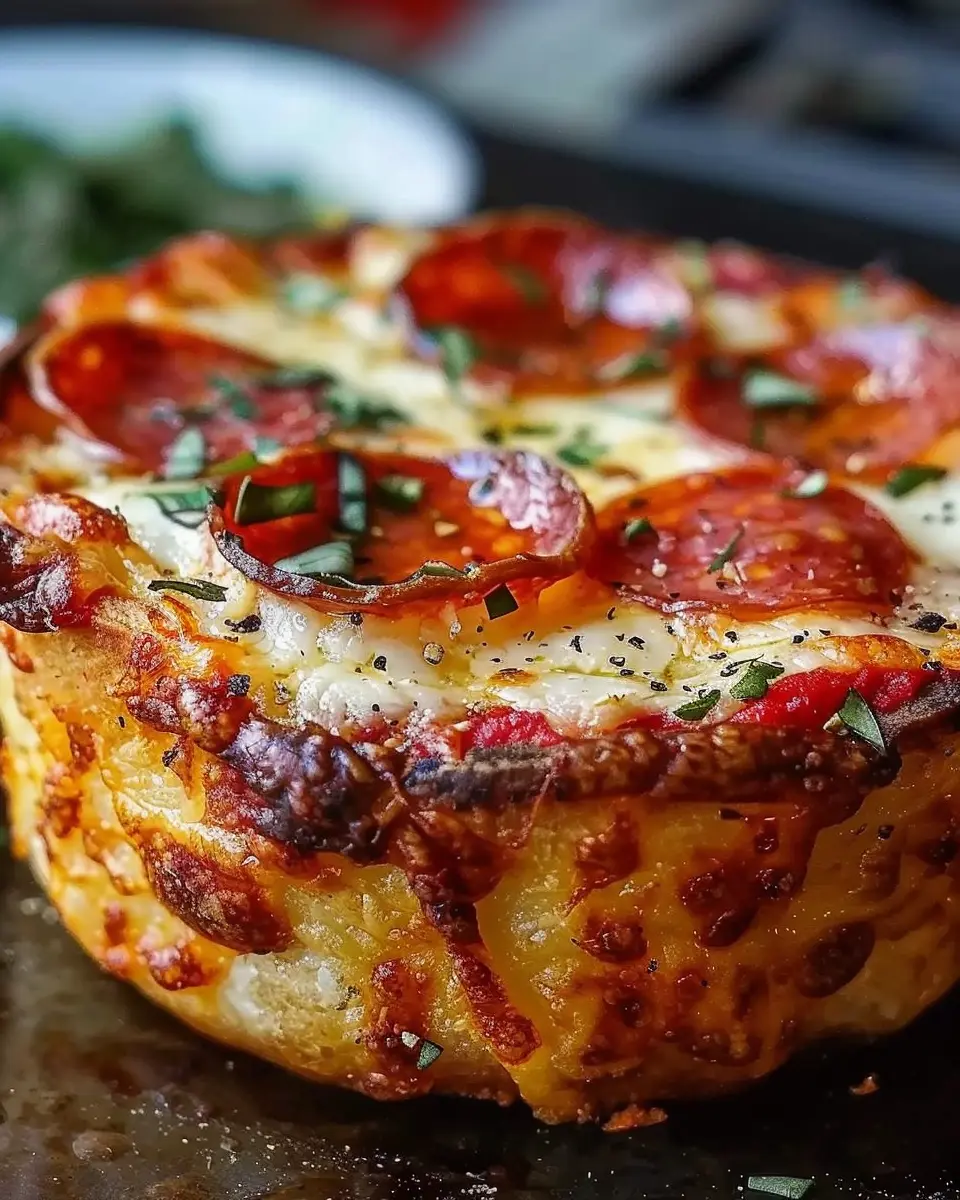
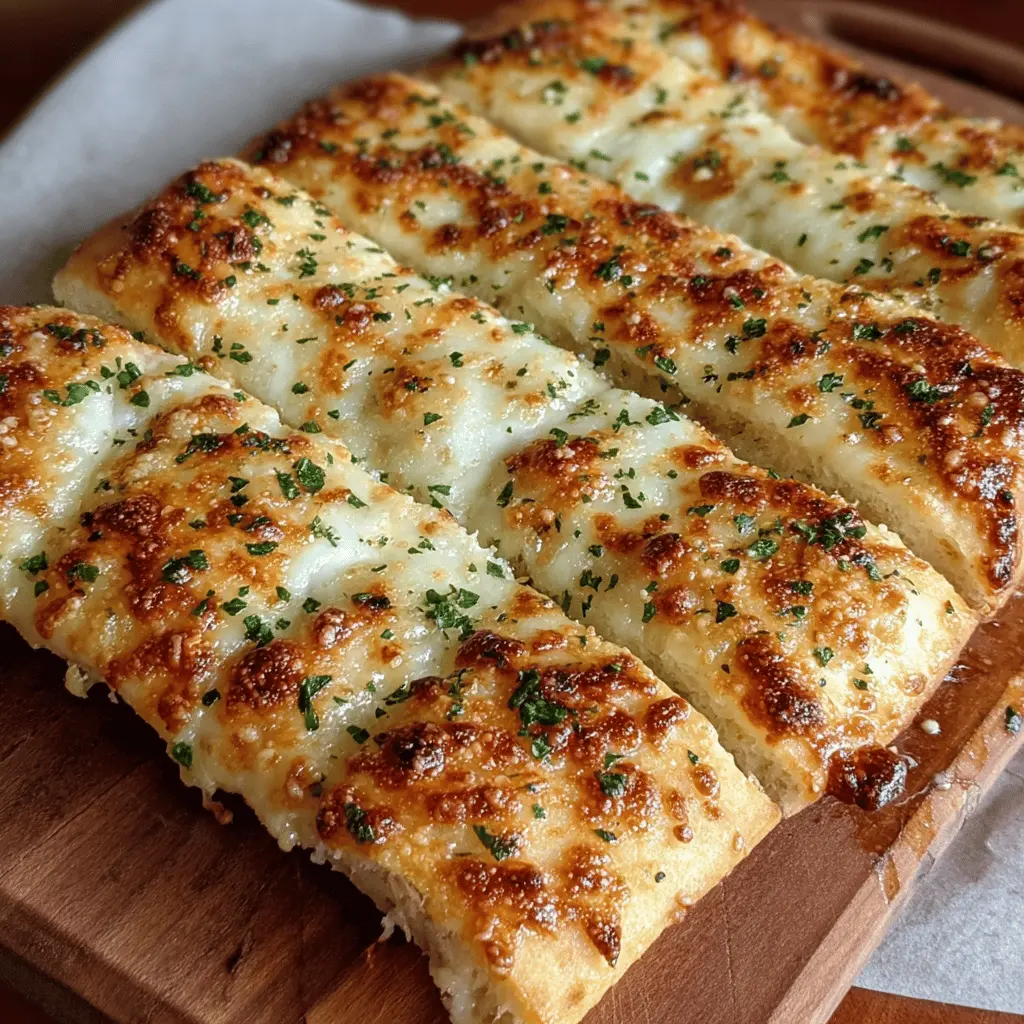
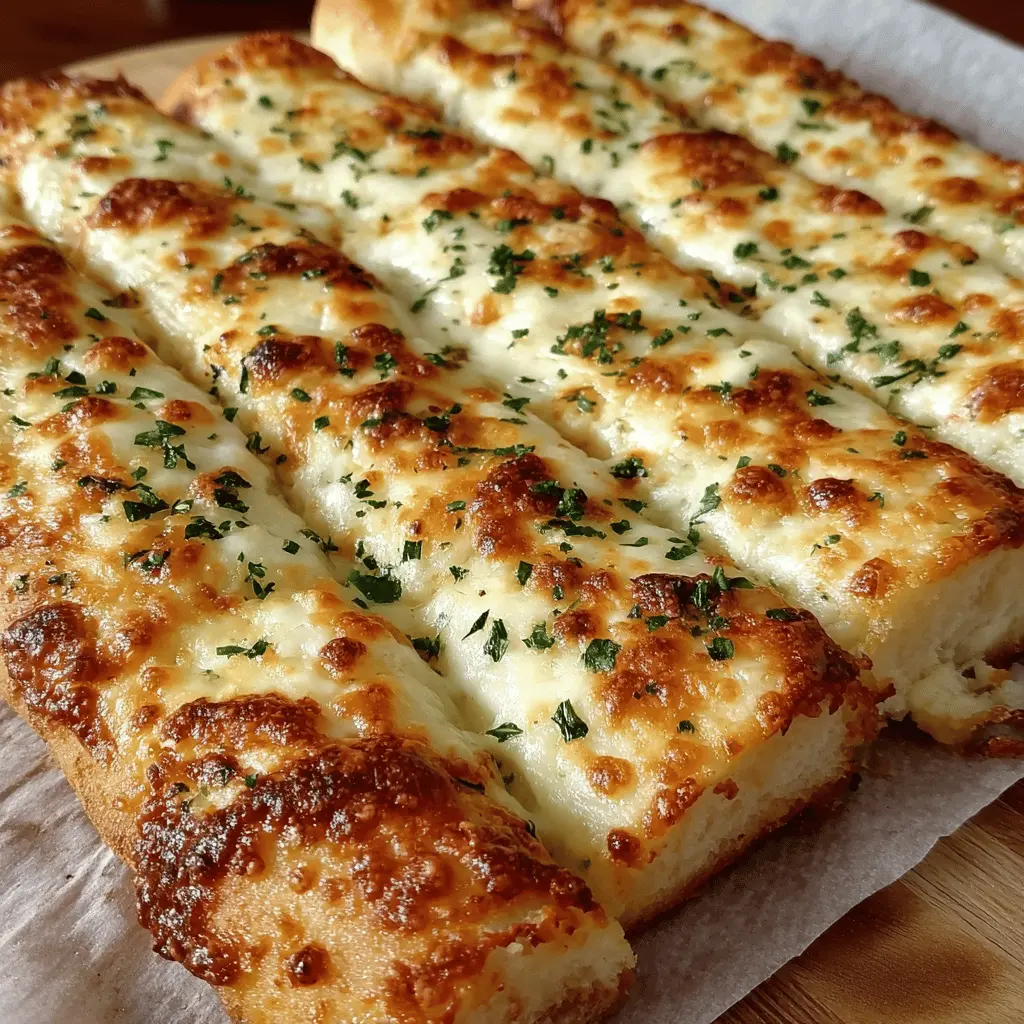
Introduction to Homemade Cheesy Garlic Breadsticks
There’s something undeniably magical about the smell of freshly baked bread. When it intertwines with the aroma of garlic and a generous sprinkle of cheese, you know you’re in for a treat. That’s why you’ll love making homemade cheesy garlic breadsticks at home! Not only are they a hit at family dinners or game nights, but they also serve as an indulgent snack after a long workday.
Why you’ll love homemade cheesy garlic breadsticks
Imagine coming home after a busy day, the kind that leaves you looking for a quick yet satisfying bite to eat. Instead of resorting to takeout, why not whip up some mouthwatering cheesy garlic breadsticks? They’re simple to prepare, and they require ingredients you likely already have at home.
Quick and Easy to Make
The beauty of this recipe lies in its straightforwardness. With just a handful of ingredients, you can create a dish that tastes gourmet! Plus, making them at home means you can control the amount of garlic, cheese, and even get creative with toppings—perhaps some chopped herbs or a sprinkle of crushed red pepper for an extra kick.
Fun to Share
Have friends coming over for a movie night? These breadsticks are perfect for sharing and will surely impress your guests. They pair wonderfully with marinara sauce for dipping, enhancing the flavor and experience. If you need ideas on how to elevate your movie night, consider checking out this guide on hosting perfect movie nights.
Healthier Alternative
When you make homemade cheesy garlic breadsticks, you also have the option to make healthier substitutions. Using whole wheat flour or adding more herbs can add nutritional value while keeping the flavors robust. You’ll also find that homemade versions tend to be lower in preservatives and artificial ingredients.
In just a short time, these delightful homemade cheesy garlic breadsticks will transform any meal into something truly special. So why not give this recipe a try? You might just find yourself making these delicious delights a regular feature in your culinary repertoire!
Ingredients for Homemade Cheesy Garlic Breadsticks
Making homemade cheesy garlic breadsticks is a delightful experience, especially when you have all the right ingredients at your fingertips. Here’s what you’ll need to whip up these comforting treats that are perfect for sharing—or keeping all to yourself!
Essential Ingredients
- 1 cup warm water: This helps activate the yeast, ensuring a fluffy texture.
- 2 ¼ teaspoons active dry yeast: Fresh yeast is crucial for that perfect rise.
- 2 tablespoons sugar: Just enough to feed the yeast and balance flavors.
- 3 cups all-purpose flour: This will be the base of your delicious breadsticks.
- 2 tablespoons olive oil: For richness and a lovely golden crust.
- 1 teaspoon salt: To enhance every bite.
- 4 tablespoons garlic, minced: Fresh garlic is key for that bold flavor.
- 1 ½ cups shredded mozzarella cheese: The star of your cheesy breadstick show!
- ½ cup grated Parmesan cheese: Adds a sharp, nutty flavor.
- Fresh parsley, chopped: For garnish and a touch of color.
With these ingredients, you’ll create irresistible cheesy garlic breadsticks that complement any meal. For more tips on ingredient selection, check out resources like Serious Eats that dive deep into the science of baking. Ready to embark on this culinary adventure? Let’s get started!
Step-by-step preparation of Homemade Cheesy Garlic Breadsticks
Homemade cheesy garlic breadsticks are the perfect combination of gooey cheese and aromatic garlic, ideal for sharing (or not!). Let’s walk through the preparation step-by-step so you can impress your friends and enjoy a delicious snack right from your kitchen.
Activate the yeast
Start by activating your yeast. This step is crucial because it ensures that your dough rises beautifully, creating those fluffy breadsticks we love. In a small bowl, combine:
- 1 packet of active dry yeast (about 2 ¼ teaspoons)
- 1 cup of warm water (around 110°F, which is cozy to the touch)
- 1 teaspoon of sugar
Let this mixture sit for about 5-10 minutes until it becomes frothy. This means your yeast is happy and ready to go! If it doesn’t froth, it could be a sign that the yeast is dead, and you’ll want to try again—trust me, it makes a difference.
Mix flour and salt
In a large mixing bowl, combine the dry ingredients. Use:
- 3 cups of all-purpose flour
- 1 teaspoon of salt
Whisk these two together to ensure even salt distribution in your homemade cheesy garlic breadsticks. Mixing them properly at this stage can prevent salty bites later on.
Knead the dough
Once your yeast is activated, pour it into the flour mixture along with:
- 2 tablespoons of olive oil
Now, get ready to knead! Bring the dough together with your hands or a wooden spoon. Once it starts forming, transfer it to a lightly floured surface and knead for about 8-10 minutes. You want it to be smooth and elastic. If you’re new to this, consider it a mini workout session! It’s a great way to relieve stress, and the aroma of dough in the air is blissful.
Prepare the garlic butter
While waiting for the dough to rise, we can prepare the garlic butter, which adds that irresistible flavor to your breadsticks. In a small saucepan, melt:
- ½ cup of unsalted butter
- 4-5 cloves of minced garlic
- 1 tablespoon of chopped fresh parsley (optional for a pop of freshness)
Cook the garlic over low heat for about 2-3 minutes until fragrant—be careful not to burn it! Set aside this heavenly mixture for later.
Roll out the dough
After your dough has risen (let it sit in a warm place, covered for about an hour, until it’s doubled in size), it’s time to roll it out. Punch down the risen dough to remove excess air, then place it on a lightly floured surface. Use a rolling pin to stretch it out into a rectangle, roughly 12 by 8 inches. Don’t worry about getting it perfect; rustic is part of the charm!
Add cheese and slice
Once your dough is rolled out, brush it generously with your prepared garlic butter. Now comes the fun part: the cheese! Sprinkle:
- 1 ½ cups of shredded mozzarella cheese
- A pinch of Italian herbs (like oregano and basil) if desired
Then, using a sharp knife or a pizza cutter, slice the dough into your preferred breadstick shapes—long and skinny or short and stubby, it’s up to you!
Bake to perfection
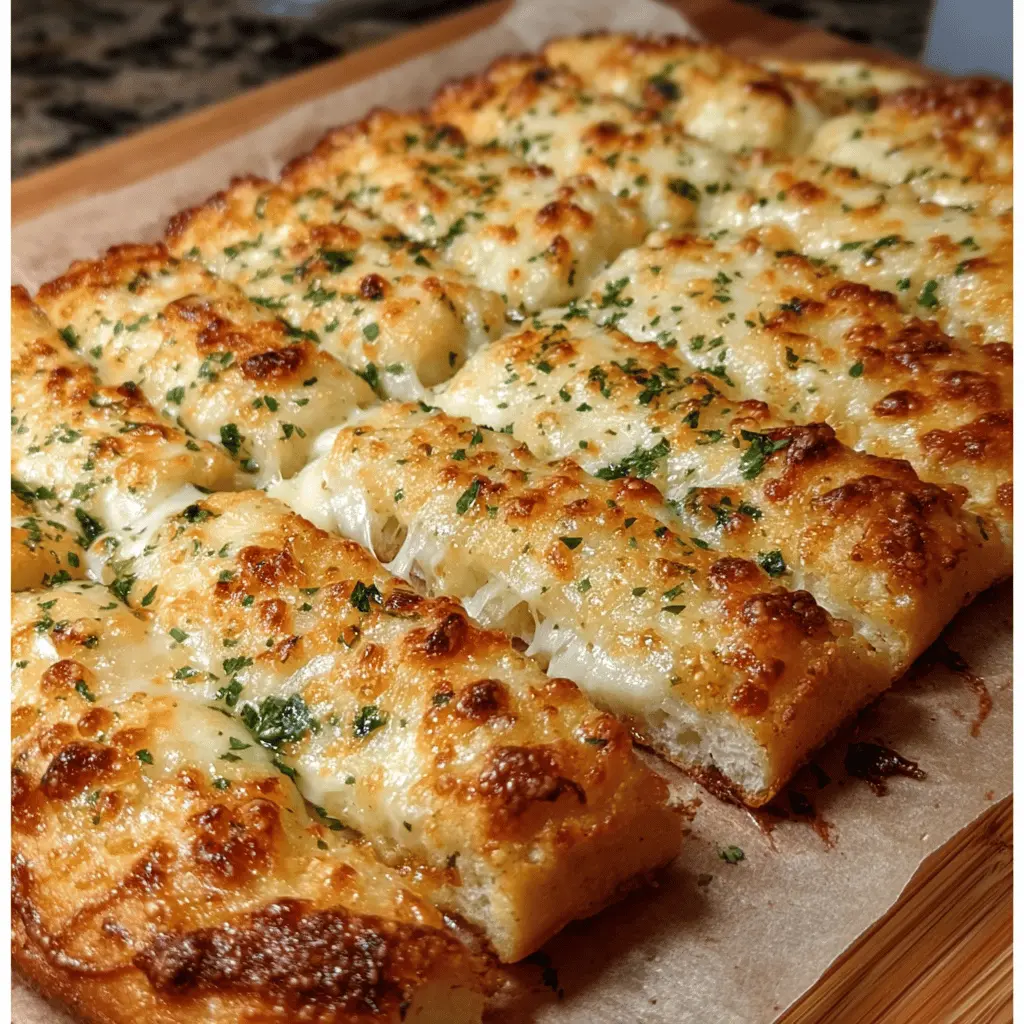
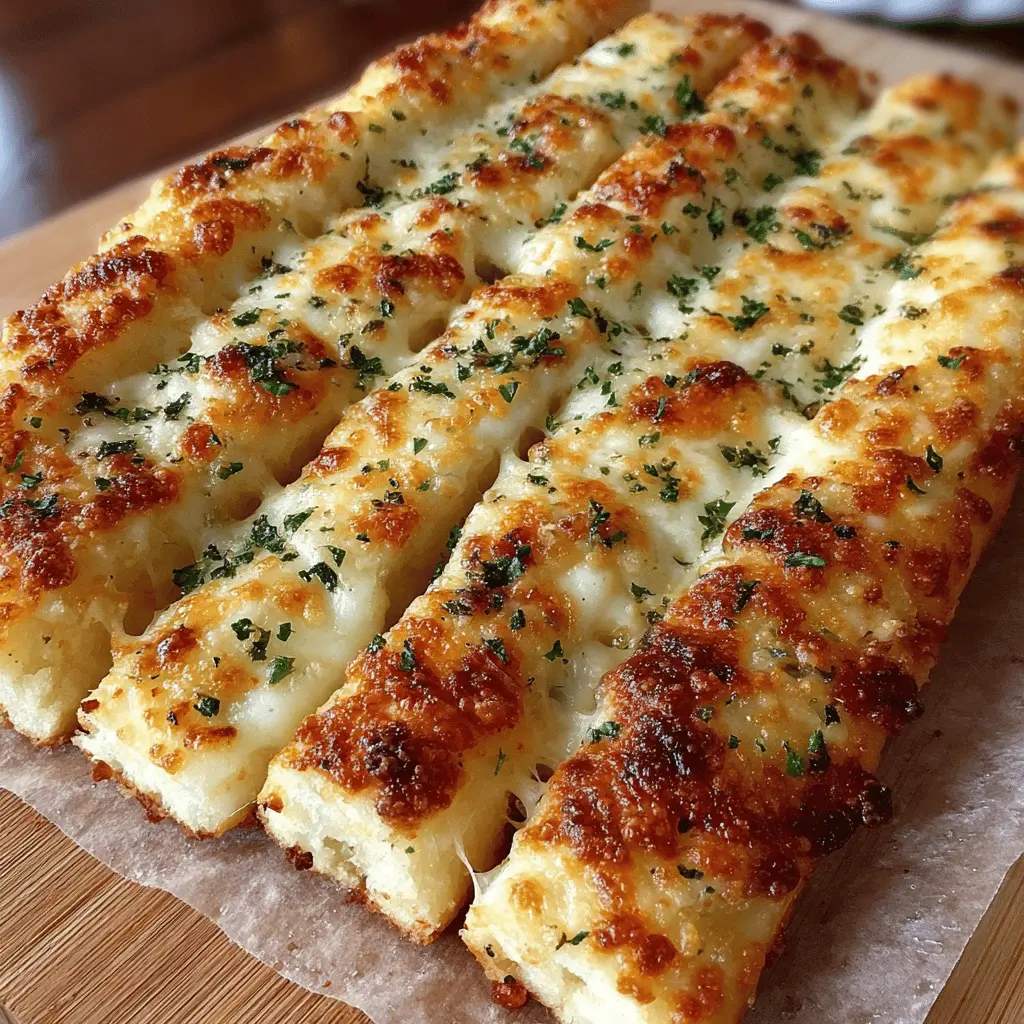
Preheat your oven to 375°F (190°C). Place your sliced dough on a baking sheet lined with parchment paper. Bake for about 15-20 minutes, or until the breadsticks are golden brown and the cheese has melted to bubbly perfection.
Once cooked, brush with any remaining garlic butter for extra flavor, and let them cool slightly before serving. These homemade cheesy garlic breadsticks are best enjoyed warm and will make your space smell like a pizzeria!
Now that you’ve got the steps down, it’s time to dive into this delicious adventure! Try pair them with your favorite marinara or creamy dip for an even better experience. For more tips on perfecting your baking skills, check out resources like King Arthur Baking or Serious Eats. Enjoy your homemade creations!
Variations of Homemade Cheesy Garlic Breadsticks
Cheesy Garlic Breadsticks with Herbs
If you want to take your homemade cheesy garlic breadsticks to the next level, consider adding an assortment of fresh herbs. Basil, oregano, and parsley work wonders when sprinkled atop. Here’s how to do it:
- Brush your dough with a blend of olive oil and minced garlic, then sprinkle with finely chopped herbs before baking.
- For a deeper flavor, mix some dried Italian herbs into your cheese blend.
- The fresh herbs not only enhance the taste but also bring a vibrant look to your breadsticks.
Did you know that herbs have incredible health benefits? With antioxidants and anti-inflammatory properties, adding fresh herbs can elevate your dish both nutritionally and flavor-wise.
Spicy Garlic Breadsticks
If you can handle the heat, why not turn those homemade cheesy garlic breadsticks into a spicy treat? Here are a couple of ideas to spice things up:
- Incorporate red pepper flakes into your garlic butter mixture for a fiery kick.
- Alternatively, try adding jalapeño slices or a sprinkle of cayenne pepper to the cheese blend.
- Serve with a side of spicy marinara sauce for dipping—your taste buds will be dancing!
These spicy variations are perfect for those evenings with friends or for a cozy movie night. You can even scale the heat to suit your preference.
Experimenting with homemade cheesy garlic breadsticks allows your culinary creativity to shine. Whether you prefer the classic herb-infused version or a fiery kick, the possibilities are endless! For more delicious variations and tips, check out resources like Food Network or Serious Eats.
So, which variation are you going to try first?
Cooking Tips and Notes for Homemade Cheesy Garlic Breadsticks
Creating perfect homemade cheesy garlic breadsticks is all about the little details. Here are some tips to elevate your baking game:
Choose Your Cheese Wisely
Opt for a blend of mozzarella for that gooey texture and Parmesan for a savory kick. Using freshly grated cheese enhances flavor and melts beautifully (here’s a guide on types of cheese for baking).
Be Mindful of Dough Consistency
The right dough consistency can make or break your breadsticks. It should be soft and slightly sticky but manageable. If it’s too dry, your breadsticks may turn out tough. Adjust with a splash of water as needed.
Herb and Spice Variations
While garlic is a must, feel free to experiment! Adding herbs like oregano or red pepper flakes will give your homemade cheesy garlic breadsticks that extra pop.
Bake at the Right Temperature
Preheat your oven to 400°F (200°C) and watch your breadsticks closely. They should be golden brown all around – this often takes about 15-20 minutes. If you’re unsure, a quick poke with a toothpick can help check for doneness.
With these tips in hand, you’ll create homemade cheesy garlic breadsticks that delight every crowd!
Serving Suggestions for Homemade Cheesy Garlic Breadsticks
When it comes to enjoying homemade cheesy garlic breadsticks, the possibilities are endless. These warm, gooey delights can serve as the perfect accompaniment to a variety of meals or even as a stand-alone snack for movie nights. Here are a few serving suggestions to elevate your dining experience:
Pair with Your Favorite Dishes
-
Pastas: They’re a classic combo with Italian pasta dishes like spaghetti or lasagna. The cheese and garlic flavors complement the rich sauces beautifully.
-
Salads: For a lighter meal, serve your breadsticks with a fresh garden or Caesar salad. The crunch of the veggies pairs perfectly with the softness of the breadsticks.
Dipping Delights
Don’t forget about the dips! Here are a few ideas to consider:
-
Marinara Sauce: A warm bowl of marinara is always a hit. The tangy flavor contrasts perfectly with the cheesy goodness of the breadsticks.
-
Garlic Butter: Drizzling a bit of melted garlic butter on top can amplify the flavor while adding a delightful richness.
Snack Attack
In need of a tasty snack? Enjoy your homemade cheesy garlic breadsticks as a quick bite while binge-watching your favorite show. They’re hearty and satisfying yet easy to prepare!
For more serving inspiration, check out food pairing tips from culinary experts!
Time breakdown for Homemade Cheesy Garlic Breadsticks
Preparation time
Getting started on your homemade cheesy garlic breadsticks is a breeze! You’ll need about 15 minutes to gather your ingredients and prepare the dough. Be sure to have all your items pre-measured and ready to go—this makes the process smooth and enjoyable. Plus, it’s a fantastic way to unwind after a long day at work.
Baking time
Once your dough is ready and shaped, it’s time for the magic! Bake your breadsticks for approximately 20-25 minutes until they’re golden brown and delectably cheesy. Keep an eye on them; you’ll want that perfect melty cheese pull!
Total time
In total, you’re looking at around 40 minutes from start to finish. This includes prep and baking time, making these homemade cheesy garlic breadsticks not only delicious but also a quick option for weeknight meals. If you’re after more easy recipes, the Food Network has some fantastic ideas to complement your breadsticks!
Whether for a quick snack while binge-watching your favorite show or as a side dish to a meal, these breadsticks are sure to impress. Happy cooking!
Nutritional Facts for Homemade Cheesy Garlic Breadsticks
When you’re enjoying homemade cheesy garlic breadsticks, it’s essential to understand what you’re consuming. Here’s a quick look at their nutritional profile.
Calories
A serving of these delicious breadsticks typically packs around 250 calories. Keep in mind, though, that toppings and portion sizes may vary the count.
Protein
Each serving offers about 10 grams of protein, largely from the cheese. This makes them a satisfying option if you’re looking to combine flavor with a decent protein boost.
Sodium
Don’t forget to watch your sodium intake! These breadsticks contain approximately 550 milligrams of sodium per serving. While it’s hard to resist their cheesy goodness, consider enjoying them alongside a fresh salad to balance the meal.
For more insights on how sodium affects your health, check reputable sources like the American Heart Association.
Homemade cheesy garlic breadsticks are a delightful treat, so enjoy them in moderation and savor every bite!
FAQ about Homemade Cheesy Garlic Breadsticks
Can I make the dough ahead of time?
Absolutely! Making the dough for your homemade cheesy garlic breadsticks ahead of time can save you precious moments on a busy day. Once you’ve prepared the dough, simply store it in an airtight container in the refrigerator for up to 24 hours. When you’re ready to bake, let it come to room temperature for about 30 minutes before rolling it out.
How do I store leftover breadsticks?
If you find yourself with extra cheesy garlic breadsticks, don’t worry! Storing them properly will keep them delicious for later. Simply wrap each breadstick in plastic wrap or place them in an airtight container and store them in your pantry for up to 2 days. For optimal freshness, you can also refrigerate them. Just be sure to reheat them in the oven or microwave to restore their warm, cheesy goodness.
Can I freeze cheesy garlic breadsticks?
Yes, you can freeze your homemade cheesy garlic breadsticks! This is a great option if you want to enjoy them over a longer period. Once baked, let the breadsticks cool completely, then wrap them tightly in plastic wrap or aluminum foil, and place them in a freezer-safe bag. They can last up to 3 months in the freezer. When you’re ready to indulge, simply reheat them directly from the freezer either in the oven or microwave.
For more tips on storing and reheating bread products, check out resources from The Kitchn and Serious Eats. Enjoy your homemade cheesy garlic breadsticks any time!
Conclusion on Homemade Cheesy Garlic Breadsticks
In wrapping up our journey into the delicious world of homemade cheesy garlic breadsticks, it’s clear that this comfort food is more than just a side dish—it’s an experience. Picture having a warm batch fresh from your oven, topped with gooey cheese and aromatic garlic, ready to complement any meal or stand proudly on its own.
These breadsticks are not only easy to whip up, but they also offer endless customization—thinking of adding turkey bacon or herbs? Go for it! So, gather your ingredients, fire up that oven, and treat yourself to a delightful snack that brings the family together. You’ll find the perfect pair for soups, salads, or just a cozy movie night. Enjoy your cheesy adventure!
For more inspiration, check out these simple appetizer recipes to elevate your next gathering!
PrintHomemade Cheesy Garlic Breadsticks: The Best Comfort Snack
Enjoy the ultimate homemade cheesy garlic breadsticks that are perfect for snacking!
- Prep Time: 10 minutes
- Cook Time: 20 minutes
- Total Time: 1 hour 30 minutes
- Yield: 12 breadsticks 1x
- Category: Snacks
- Method: Baking
- Cuisine: American
- Diet: Vegetarian
Ingredients
- 2 cups all-purpose flour
- 1 teaspoon sugar
- 1 teaspoon salt
- 1 tablespoon instant yeast
- 1 cup warm water
- 3 tablespoons olive oil
- 1 cup shredded mozzarella cheese
- 2 tablespoons garlic butter
Instructions
- Mix warm water with yeast and sugar; let sit for 5 minutes.
- Add flour, salt, and olive oil to the yeast mixture; knead until smooth.
- Let the dough rise for 1 hour, covered.
- Roll out the dough into sticks and place on a baking sheet.
- Brush with garlic butter and sprinkle mozzarella cheese on top.
- Bake at 400°F (200°C) for 15-20 minutes until golden brown.
- Serve warm and enjoy!
Notes
- Add herbs like oregano or parsley for extra flavor.
- Serve with marinara sauce for dipping.
Nutrition
- Serving Size: 1 breadstick
- Calories: 150
- Sugar: 0.5g
- Sodium: 300mg
- Fat: 6g
- Saturated Fat: 2g
- Unsaturated Fat: 3g
- Trans Fat: 0g
- Carbohydrates: 22g
- Fiber: 1g
- Protein: 5g
- Cholesterol: 10mg
Keywords: Homemade Cheesy Garlic Breadsticks